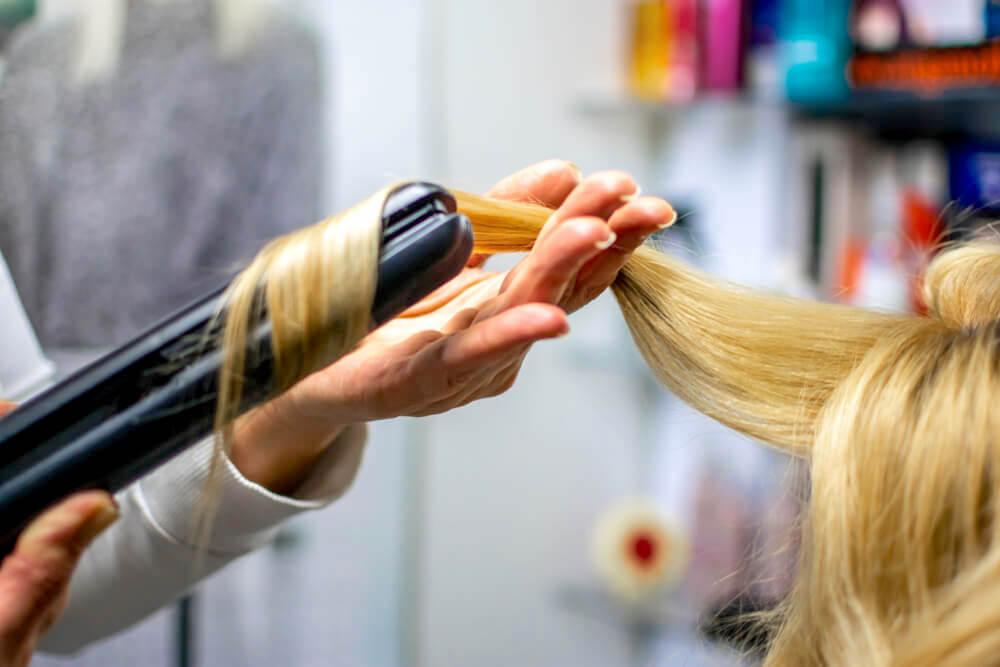
You can get more than straight hair with a flat iron. The best part about investing in a high-quality flat iron is that you can create all kinds of hairstyles – pin-straight, beach-wavy, or corkscrew-curly.
That’s right – you can achieve beautiful bouncy curls with the same tool that makes your hair super straight and smooth.
Curious? Let’s get started!
Before Curling Your Hair
Before starting this process, make sure you have all the tools you need:
• flat iron
• heat protectant (to minimize the heat damage)
• hairbrush (to make sure there are no knots in the hair)
• clips and ties (to hold parts of the hair in place during the process)
• pencil (to be used in a unique way if curling the hair)
• hairspray (to fix the curls)
Before diving into all the hairstyles you can achieve with a flat iron, it is important to prepare your hair in the best way possible.
- Make sure your hair is clean and dry. If your hair is wet or damp, it will not curl properly. The hair shouldn’t be too dirty either, as the curls will not hold. So it is best if you have washed your hair in the past 24 hours. If you are blow drying your hair, use some mousse for extra volume.
- Use a thin flat iron (1.5 – 2 inches width). A thin flat iron will make it much easier to wrap your hair around it and get the curls you want. Make sure that your flat iron is of good quality. The better the quality, the quicker the result and the lower the heat damage.
- In terms of temperature, you can adjust it according to your hair type. If your hair is thin and fragile, go for the minimum. If your hair is coarser or thicker, increase the temperature.
- Protect your hair with a heat protectant to reduce the damage from the heat. Make sure to apply it all over the hair. Should there be any knots in your hair, make sure to detangle them before starting with the flat iron.
Now that your hair is clean, dry and protected, and all the tools and accessories are prepared, you are ready to go! Check out these easy yet stunning wavy hairstyles you can do with a simple flat iron!
Basic Curls
Curling your hair in general, even with a curling iron, can be tricky and can result in accidents. Similarly, curling with a flat iron can take a while to master. Especially because sometimes you may get the perfect curl, sometimes your hair will still turn out straight. It’s all about practicing.
Before getting started, it’s best to have your hair already straightened. This will make it easier to divide it. Using clips and/or ties, part your hair into 1-inch sections. Spray all your hair with the heat protectant.
You can start practicing curling with a section of hair from the front to get the movement perfectly.

- Take a section of hair and clamp it at the bottom of the hair in the flat iron, and then gently roll upwards so that the hair is wrapping around the iron.
- Keep going until the iron is at the top and the entire section of hair is wrapped around it. Keep it there for a few seconds and then gently release the hair by pulling the iron downwards.
- Repeat the process with the remaining sections of hair and you will achieve the basic curls
Glamorous Waves
The process to obtain big glam waves is similar to the one for basic curls.
- Part your hair into 3-inch sections and apply a heat protectant.
- Clasp the ends of your section with the flat iron and wrap the hair around all the way to the root.
- Hold the hair in the iron for a few seconds and then gently release.
- Make sure to fix those big curls with hair spray and you’re good to go!
Super Tight Bouncy Curls
Looking for extra curl and volume? Check out the tight curls and how fun they are to do!

Here you would do each section of hair at once.
- Starting from the back of your hair, separate a 1-inch section and pull the rest of the hair in a bun with a hair clip.
- Take the 1-inch section of hair and wrap it around a pencil. Hold this tight with one hand.
- Grab the flat iron and pass it along the hair-wrapped pencil, keeping it for a few seconds.
- Slowly remove the pencil, and you got some bouncy curls!
From the rest of the hair, pull again a 1-inch section, while reclipping the rest. Then repeat this process with the rest of the hair!
Loose Waves
As usual, you will work here with 1-inch sections of hair. Start by taking one section and heat the hair as if you straighten it.
While the hair is still warm from the heat, quickly wrap around finger from ends to root and then pin this bundle of hair to the head with a hair clip.
Keep doing this with the rest of the hair and leave all the sections of hair clipped for 5-10 minutes. When the time is up, release them and enjoy your loose waves.
Curly Blowout

Separate your hair in 2-inch sections. Take a first section of hair. Place the flat iron at the roots.
Take the hair and bring it halfway around the flat iron then bring it back in between the plates.
Clasp the hair and slowly pull the iron down towards the end. Finish the rest and you have achieved a curly blowout look!
Perfect Crimps
Crimped hair was very trendy in the 80s and nowadays some people can be put off by it. But it does not have to be that way!
If you enjoy the look but softer, you can definitely achieve it with a flat iron. So many flat irons come with plates especially for getting crimped hair. But if you just have a plain old flat iron, you can still get it.
- Start with your hair dry, and then part it into 1-inch sections.
- After parting each section, braid it and secure it with a hair tie. Keep going until you get small braids all over.
- When you are done, spray them generously with a heat protectant.
- With a hot flat iron (be careful!) press on each braid, from top to bottom, along its length. Each time you press, make sure to leave it for 1-2 seconds so that the heat does its job.
- After you are done with all the braids, untie them all and gently separate them.
Voila! Perfectly crimped hair.
Beachy Waves
Looking for a relaxed look? You want something in between completely curly hair and straight hair? Beachy waves are not only perfect for a soft look but they are also giving some extra volume to the hair and are easy to achieve.
Before starting, make sure your hair is dry and untangled. Braid your entire hair into a low braid and tie it at the end. Spray heat protectant all over the braided part.
Then run the flat iron over the braid for a few times, and holding for a few seconds each time. Gently undo the hair to reveal relaxed beach waves.
Cool Girl Waves
Hold a 2-inch section of your hair away from the head. Place the flat iron near your roots, and clasp the section of hair diagonally.
Close the iron as you curl upwards and then back down. The part that you just curled, hold it with two scissored fingers. Then move lower along the section of hair and repeat – with the flat iron close to where your fingers are, clasp the hair and then curl it up and down.
Finish the rest of the hair carefully. Run your fingers through the waves while spraying some hairspray. Now you have achieved effortless cool-girl waves!
Finger Waves

Are you a fan of 30s hairstyles? It was always the movie stars rocking the finger waves on the red carpet. But it is actually a super easy wavy hairstyle that you can achieve with your good old flat iron.
Start with dry hair and divide it into 2-inch sections. To get started, grab a hair section and put it into the flat iron in an S-shape. Start from the root and move towards the ends, leaving the hair in the flat iron for 2 seconds at a time.
Continue with the rest of the sections and voilà! Fabulous glamourous hair!
The 5-Minute Curl
If you are in a rush and want to look put together, 5 minutes are enough. This is a look that can be achieved quickly and super easily.
- Split your hair into 3 sections of hair and apply a heat protectant.
- Take on a section and twist it completely around itself.
- Take the flat iron and pass it along the twisted hair, leaving it a few seconds at a time and then let go.
- Do the same for the other 2 sections.
- Gently shake the hair to reveal the curls and apply hair spray.
Don’t Forget…
It’s important to remember a few hair-protecting tips when using flat iron – after all, this is a heat styling tool!
Here are a few things to remember to make the curling experience a fun and safe one:
- Make sure that your hair is completely dry before starting
- Generously apply heat protectant on your hair before using the flat iron.
- After you are done curling your hair, apply hair spray all over to fix the curls.
- Pay attention to the hot plates. Just like the curling iron, the flat iron can leave some painful burns.
In general, for your curls to hold, you have to apply hairspray afterward. But this can largely depend on your hair type. Thinner hair might need more hairspray compared to thicker hair.
Also, if you want a more relaxed look with looser curls, run your fingers through the hair and tousle it. For more hold, stick with hair spray all over the curls.
It’s that easy!
Leave A Comment